Well, I’d love to discover new thing and try something new just to learn how it work.
That’s one of the thing that I wish will remain even after growing up and being old man . :P
So, I’d ordered some stuff from http://www.cytron.com.my at few months back.
At that time, it mainly because I need its “Programmer” connector to upgrade the firmware into one of the
chip we used in my office’s research / test component.
Instead of just ordering for the cable, I order the whole start-up kit.
Or more precisely , I bought the “Final Year Project Starter Pack 02” from cytron.com.my.
(oh..btw, I didn’t claim any single cent from the office for this one.. therefore,the whole set are rightfully mine. :P)
After the connector is no longer needed, as it was just to upgrade the firmware on one of our RnD board.
After almost a year,I opened up the box and start looking at it.
Then I thought why not just open the box and write something like.
“Writing C code,compile to HEX and getting it into a micro-controller chip with PIC18F4550″‘.
I spend first few hour to get everything hook up correctly and successfully wrote something on it. :)
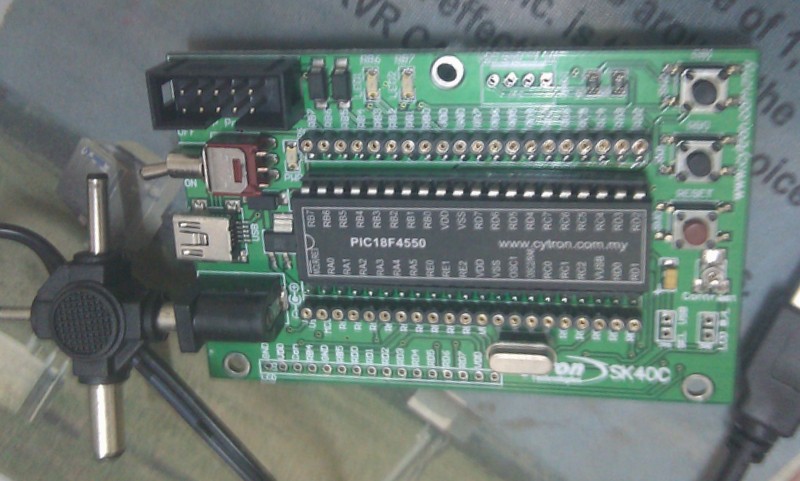
This starter pack includes the PIC microcontoller, LED as output, push button as input, multi meter for troubleshooting and verification, programmer and bread board. A comprehensive set to start for me.
Package Include:

    SK40C x 1
    PIC18F4550 x 1
    UIC00B Programmerx 1
    AC-DC Adaptor TMC-500PM x 1
    Digital Multimeter x 1
    Bread Board x 1
    LED 3mm x 10
    Push Button x 5
    Jumper Wire x 5m
    Resistor 330R x 10
    Resistor 1K x 10
    Resistor 10K x 10
So, I connected everything starting with .
Putting PIC18F4550 IC(microcontroller chip) into SK40C’s IC slot.
and. this the programmer interface ..”UIC00B.”
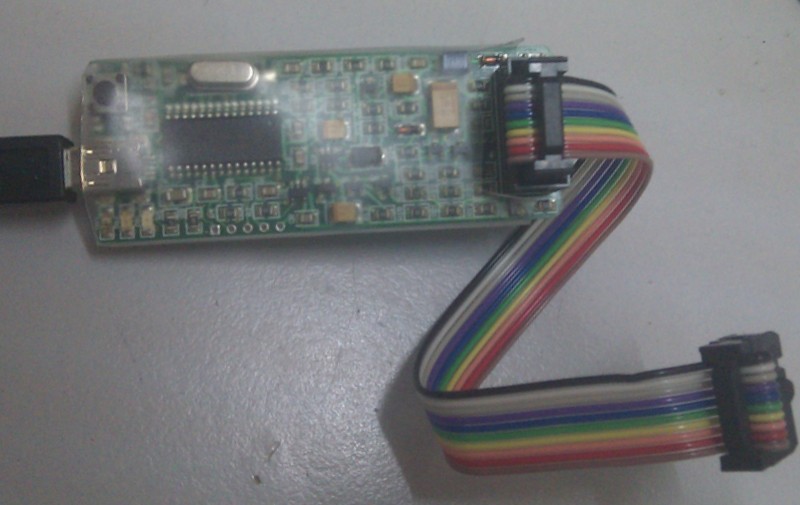
Then, UIC00B Programmer interface to USB port on the PC.
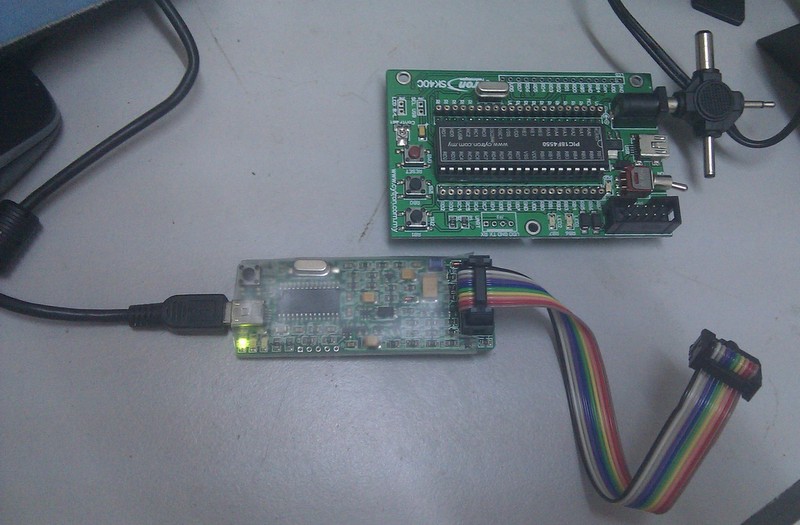
Then connect SK40C to UIC00B Programmer interface . (rainbow cable)
Then, ready to go.. :)
There is avalaible tutorial video how to connect all this.
Aha. before that, I just need to install some software on my computer first.
The list are:
1.MPLab IDE. (v8.46)
2.PICKit 2 (v2.61)
3. MPLAB C for PIC18 MCUs.
Some of the software are provided inside the CD that come together with the Packages.
except for the Hi-Tech C compiler which I failed to use its Lite version.
So, I downloaded the “MPLAB C for PIC18” lite version from microchip website.
Which run beautifully without problem..
Here , how I start.
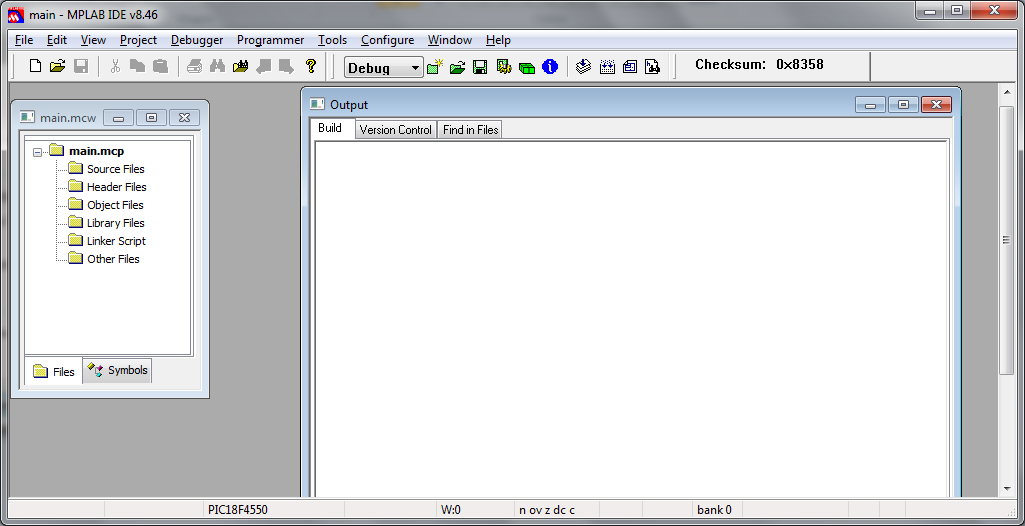
MPLAB IDE interface is as follows.
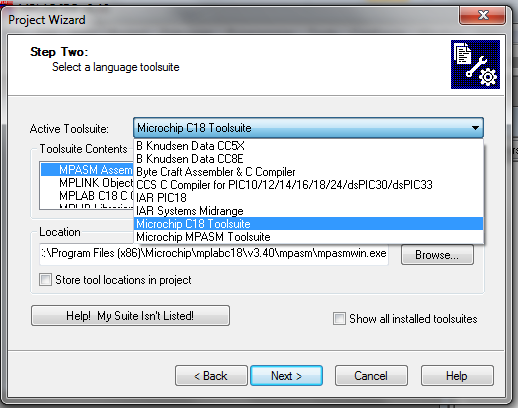
Start with new project wizard.
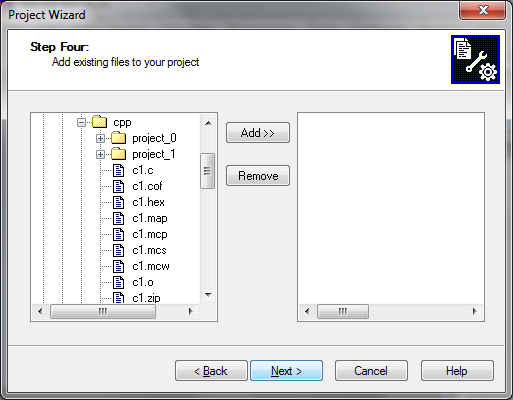
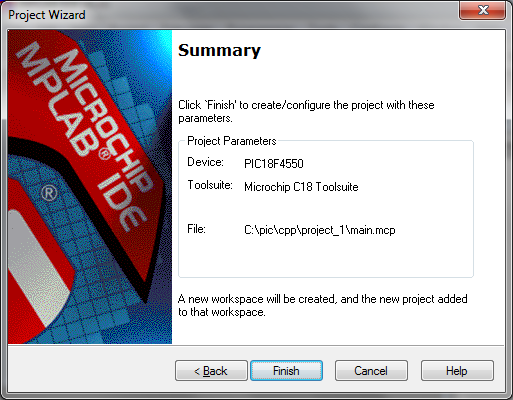
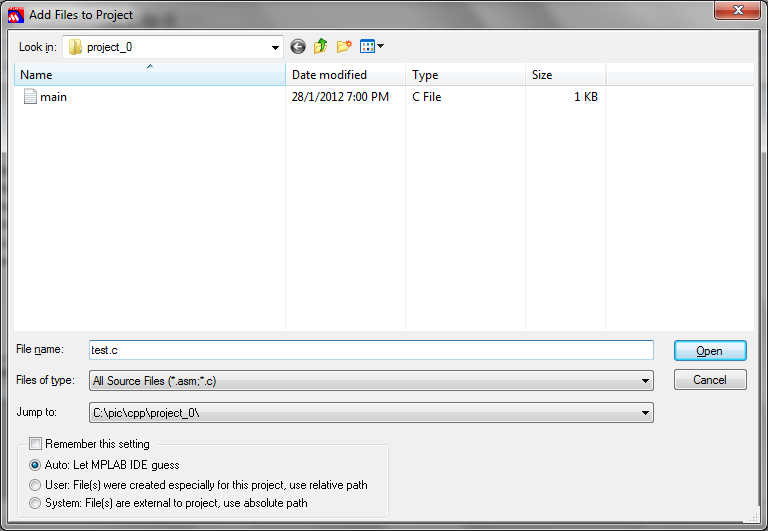
then it would become something like this.
at which I can add files and more thing into it.
First thing I add is the header for this CHIP , sitting somewhere at “C:\Program Files (x86)\Microchip\mplabc18\v3.40\h>”:
19/02/2011  04:37 AM            54,114 p18lf46j11.h
19/02/2011  04:37 AM            72,158 p18lf46j13.h
01/06/2011  04:23 AM            64,045 p18lf46j50.h
19/02/2011  04:37 AM            79,095 p18lf46j53.h
19/02/2011  04:37 AM            68,756 p18lf46k22.h
19/02/2011  04:37 AM           159,899 p18lf46k80.h
19/02/2011  04:37 AM            72,158 p18lf47j13.h
19/02/2011  04:37 AM            79,095 p18lf47j53.h
19/02/2011  04:37 AM           163,094 p18lf65k80.h
19/02/2011  04:37 AM           163,094 p18lf66k80.h
09/06/2011  05:36 PM           315,200 pconfig.h
18/06/2009  06:21 PM            22,649 pcpwm.h
19/02/2011  04:37 AM            31,340 pmcv20usb.h
04/06/2010  12:43 PM            35,211 pmp.h
18/06/2009  06:21 PM             7,847 portb.h
24/12/2009  12:03 PM            17,334 pps.h
19/12/2008  04:33 PM             2,166 ProMPT.h
10/08/2010  08:57 PM            29,949 pwm.h
19/12/2008  04:33 PM               940 reset.h
04/06/2009  02:21 PM            20,747 rtcc.h
10/12/2003  06:54 AM               670 setjmp.h
19/07/2009  07:21 AM            19,926 spi.h
05/08/2004  02:46 AM               302 stdarg.h
05/08/2004  02:52 AM             1,883 stddef.h
02/10/2004  02:48 AM             1,024 stdio.h
10/12/2003  06:54 AM             6,331 stdlib.h
10/12/2003  06:54 AM            35,401 string.h
18/06/2009  06:21 PM             5,860 sw_i2c.h
18/06/2009  06:21 PM             4,416 sw_spi.h
18/06/2009  06:21 PM             2,903 sw_uart.h
22/12/2010  12:08 PM            52,966 timers.h
18/06/2009  06:21 PM            19,970 usart.h
05/05/2009  01:25 PM             4,165 xlcd.h
             321 File(s)     17,139,562 bytes
               2 Dir(s)  188,943,335,424 bytes free

C:\Program Files (x86)\Microchip\mplabc18\v3.40\h>
Adding it so that I didn’t have to re-define the whole port for the PIC18F4550 manually . :P
To use .. I just define to include those file header into my c code.
#include
#include

#pragma config FOSC = INTOSCIO_EC //Internal oscillator, port  on RA6, EC used by USB
#pragma config WDT = OFF //Disable watchdog timer


#define    LED1    LATBbits.LATB6
#define    LED2    LATBbits.LATB7
void main(void)
{
    unsigned char i;

    //init();      // initialise PIC
    TRISBbits.TRISB0=1;     //configure PORTB I/O direction as output
    TRISBbits.TRISB1=1;     //configure PORTB I/O direction as output
    TRISBbits.TRISB6=0;     //configure PORTB I/O direction as input in case want to use SWitch1
    TRISBbits.TRISB7=0;     //configure PORTB I/O direction as input in case want to use SWitch2


  LED1 = 0;//Set LED Pin
    LED2 = 1;//Set LED Pin

    while(1)
    {
    // on both
    Delay10KTCYx(25); // delay 200ms
    LED1 ^=1;
    LED2 ^=1;
    }
}
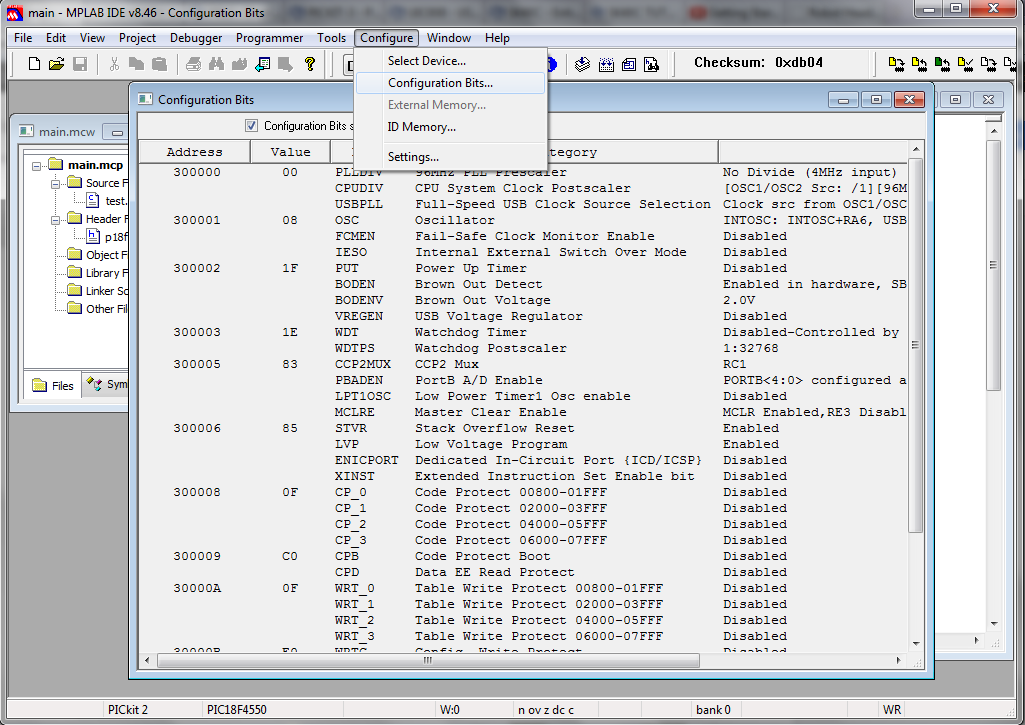
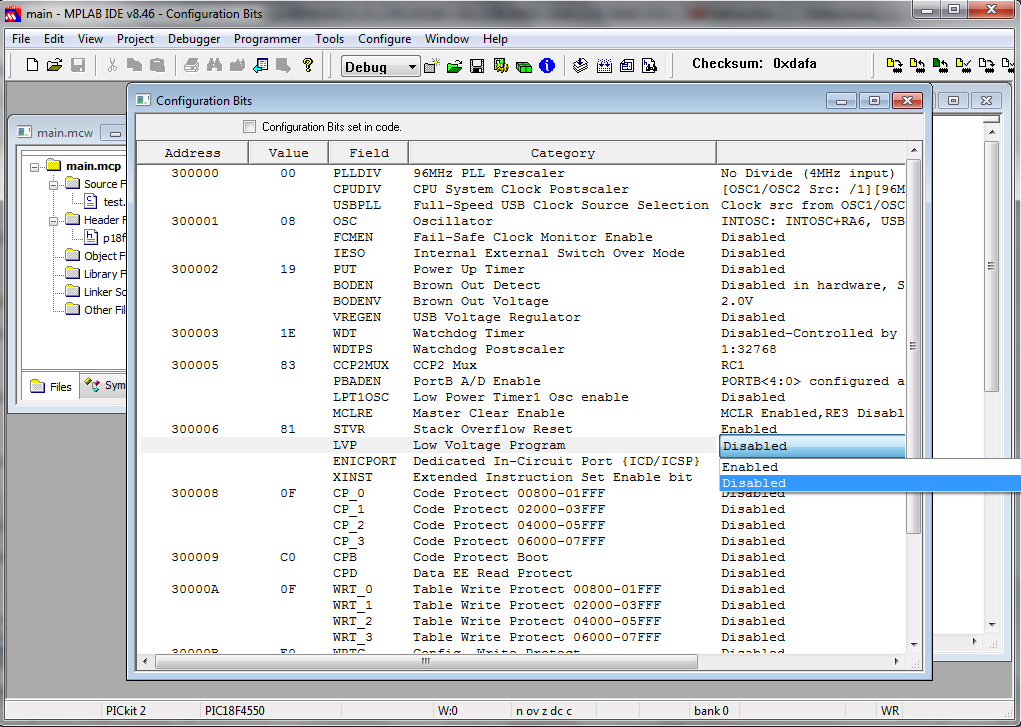
some setting at the “configuration bit.”
Disabling the “watchdog” and “low voltage ”
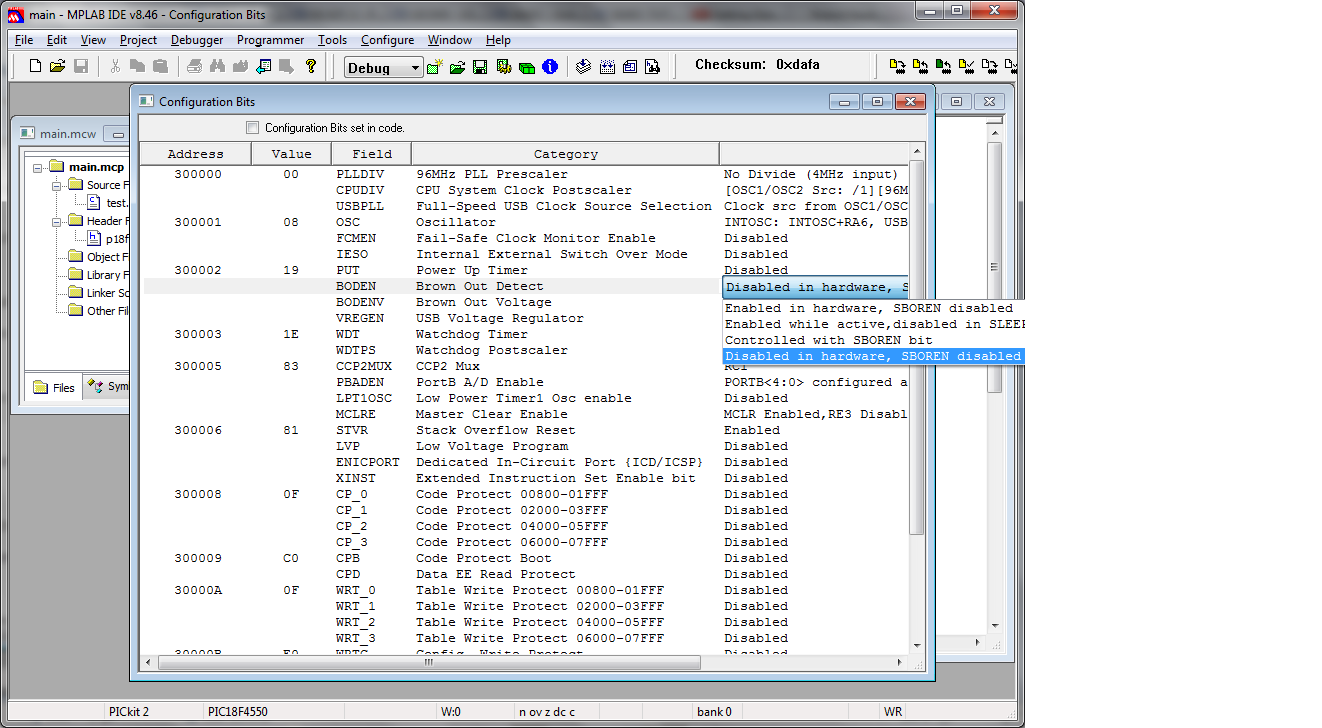
then time to connect and upload it to the real chip.
this can be done in two different way..
One .. get it to generate the HEX code, and manually use PicKit 2 to write into the chip.
however.. to save the configuration bit.. from the MPLAB IDE.. use the File -> Export .
then the HEx will be generated.
From there.. just run PIC Kit 2 and .. connect the PIC programmer cable, rainbow cable, power on everyting,
at PIC Kit 2-> Tools -> check communication , it shall report as connected.
Then.. just File -> Import Hex, then WRITE !.
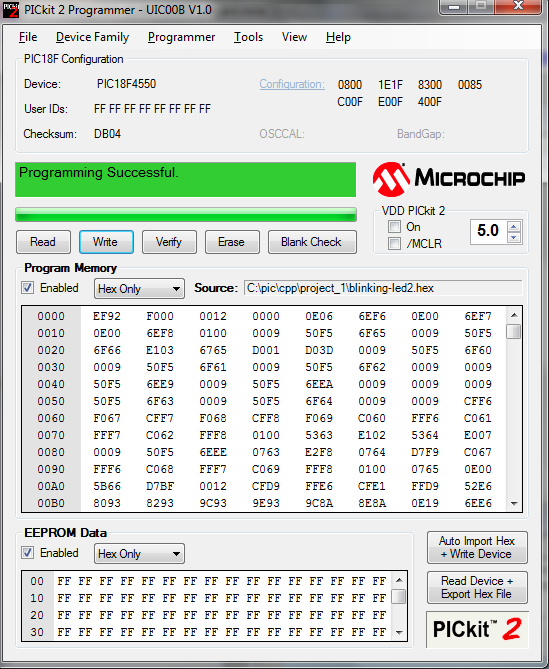
Other easier way , is to use MPLAB IDE interface .. Programmer -> PIC Kit 2.
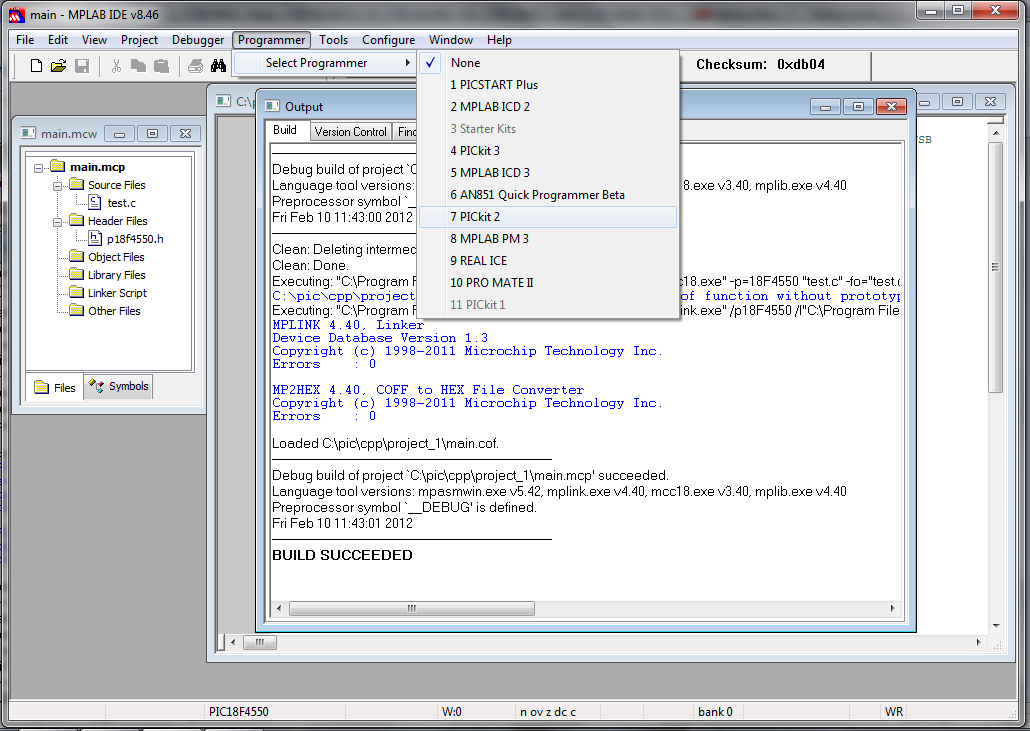
then .. set the programmer setting.
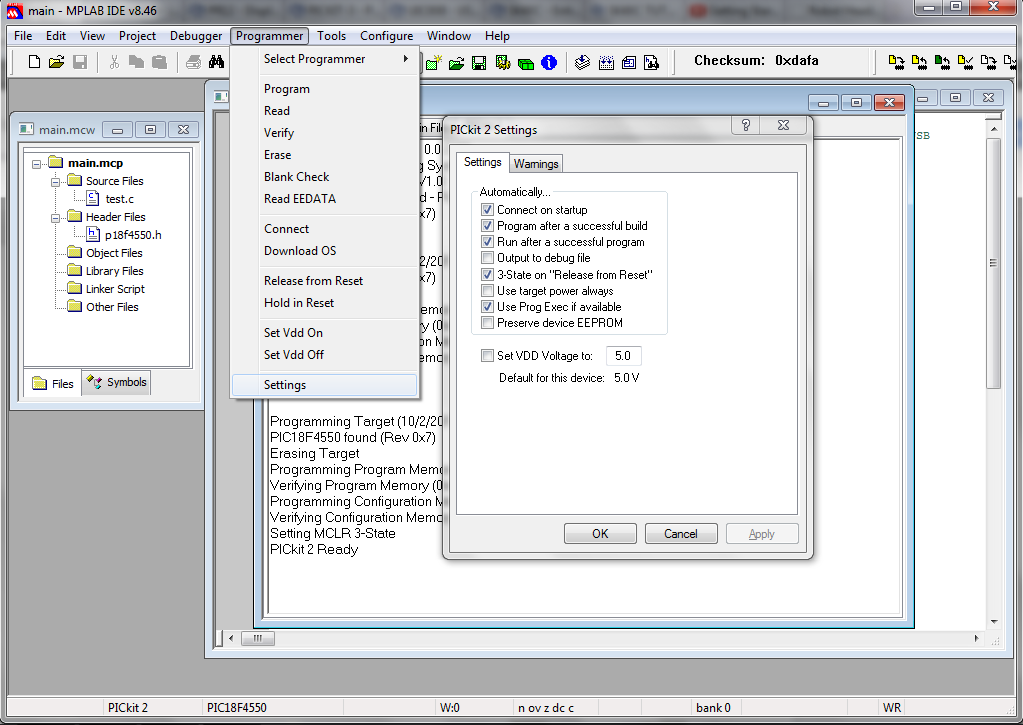
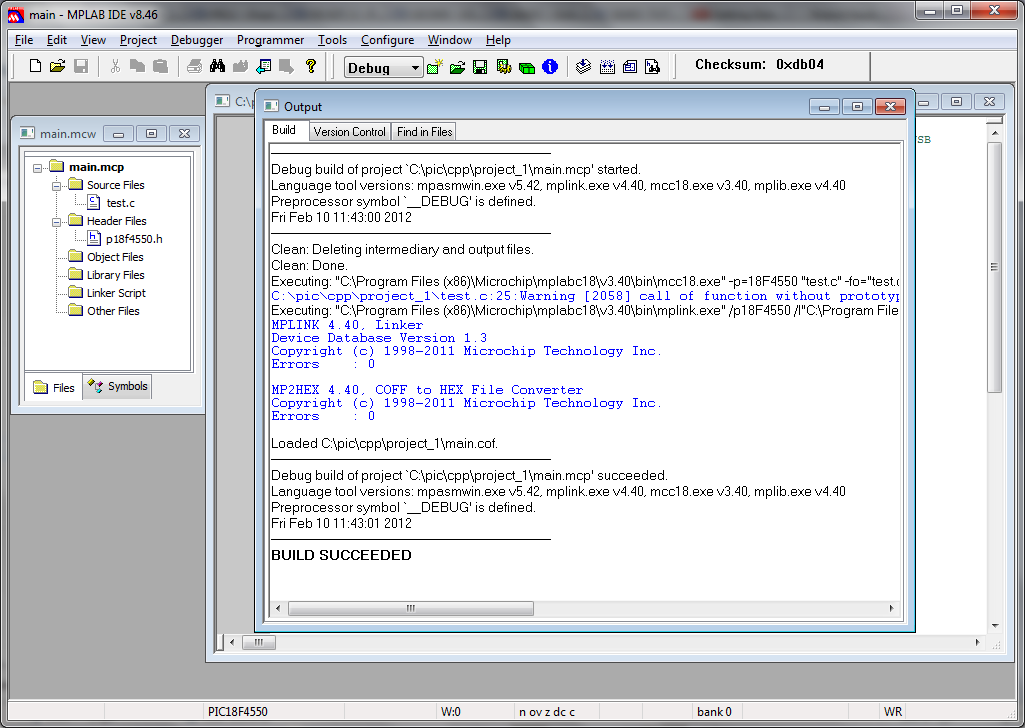
then.. just clean .. and rebuild all.
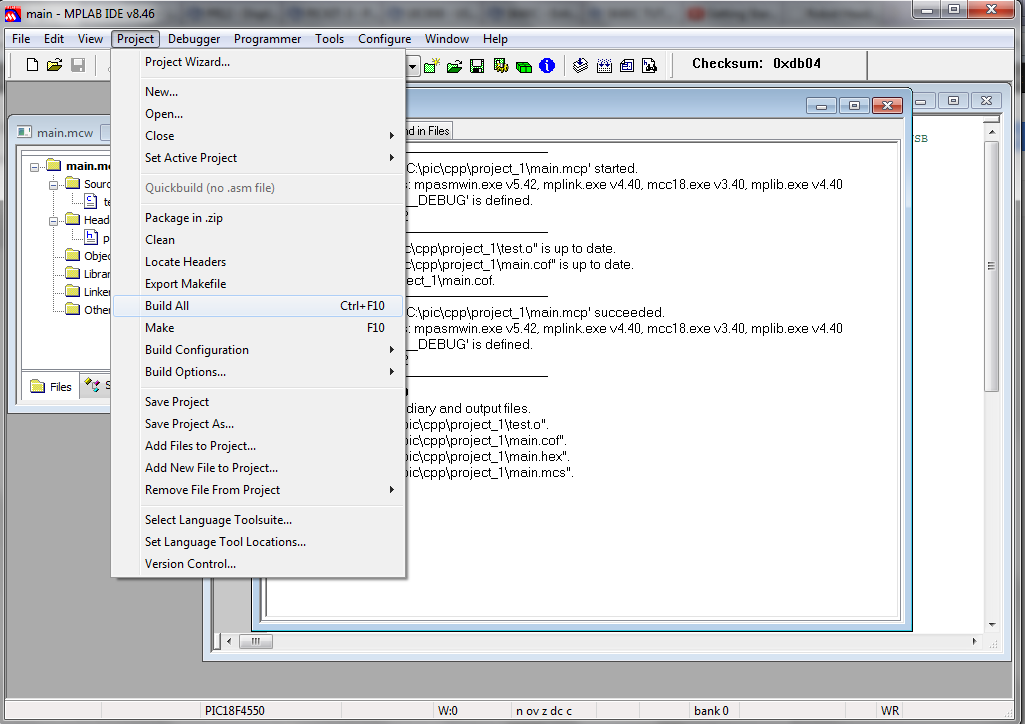
.. with the programmer connected. it would spit something like this.
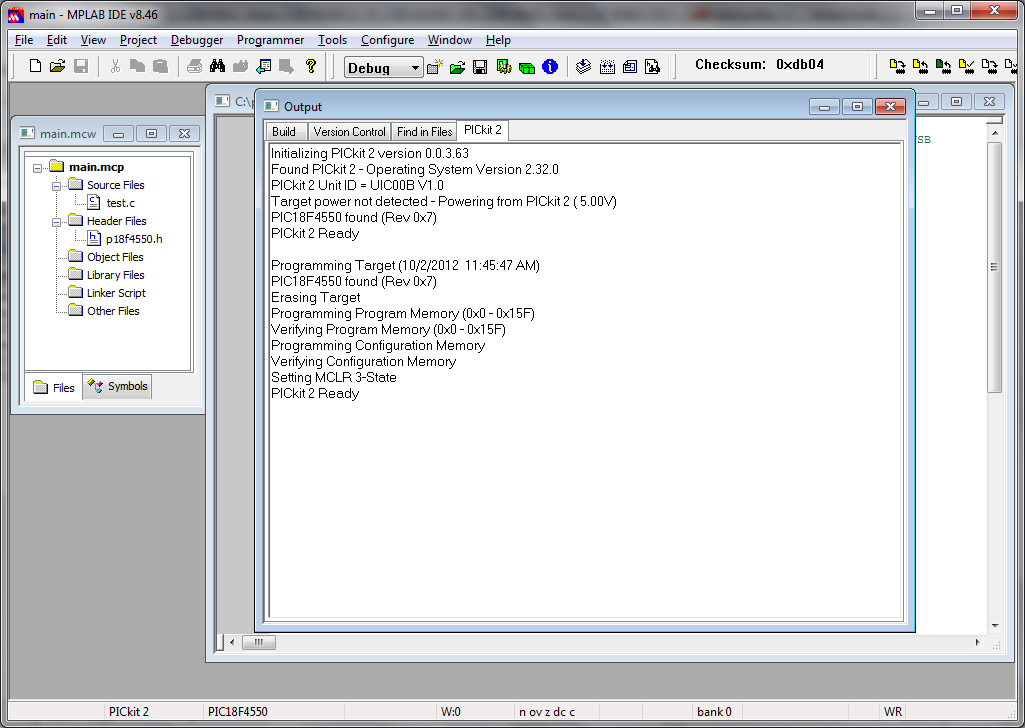
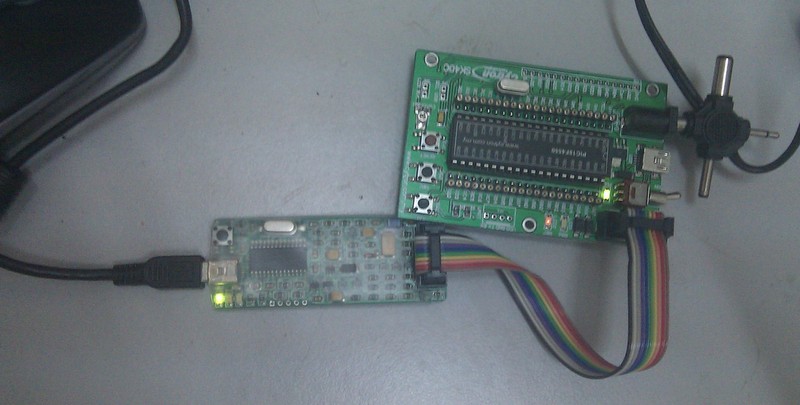
After that, turn the SK40C off..
disconnect the rainbow cable from SK40C to USB-programmer.
power on the SK40C alone.. then it would run the new HEX as expected. :)
result would be something like..
adGIRRh03vU
https://plus.google.com/u/0/113037984437874858904/posts/4o9yWxKFhPR
More details at : http://tutorial.cytron.com.my/2011/08/05/sk40c-tutorial/
p/s : ..for the next thing,maybe is to get the UART connected to a GSM modem, connect the relay to one of the DI, write C code to receive and decode the received SMS.. and act accordingly to turn on/off the relay.. and maybe add the LCD to show status.. relay to be connected to one of electrical appliance. or may be a series of electrical appliance..
then .. maybe get it integrated to a web interface just to encode the SMS to be sent to this device.
Hmm.. only until recently I realize my understanding of Digital Input (DI) is actually reversed of what I thought is Analog Input. . haha.
Leave a Comment