Finally, decided to root the wife’s HTC wildfire..
She keeps complaining of the HTC sense slowing down the phone..
every few months ..
got to reset to factory setting.. and recently it would last lesser time.
After few hours trying..
I found out the summary would be as follows :
http://forum.xda-developers.com/showthread.php?t=1145035
First.. check the HBOOT version.
By reboot the phone and hold the VOLUME dOwn button while pressing POWER On. button..
Mine is HBOOT 1.01.0002 which not supported by tools just yet.
It would need to downgrade to HBOOT 1.01.0001 .. to make use of the tools and initiate the S-OFF.
(HBOOT 1.01.0002) to unbranded WWE (HBOOT 1.01.0001).
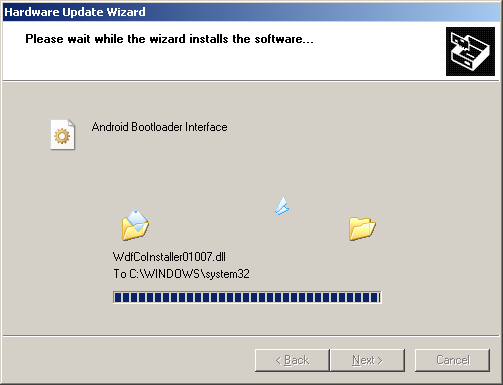
Install Driver
Pre-requisite is to get the Windows to recognize the devices..
Install the driver for the USB to to HTC Wildfire.
Shortest path to this is download the “HTC Sync” from htc website..
http://www.htc.com/hk-en/help/htc-wildfire/#download
I just installed the driver and stopped after that.. right before its starting to install the application itself.
for the boot loader part. I found the following is really useful.
http://unrevoked.com/rootwiki/doku.php/public/windows_hboot_driver_install

Connect the phone to PC
1. Make sure USB Debugging is enabled on your phone in Menu > Settings > Applications > Development.
2. Connect the phone to your computer via USB and set the mode to charge only.
3. It would appeared nicely in the “Device Manager” as “Android 1.0” if driver installed properly.
(else it would appear as just ADB – unknown devices )
4. If you phone is at the HBOOT screen, It would appear as “Android Bootloader Interface”.
Downgrade HBOOT.
I started by referring to the above page and download the big file from (here).
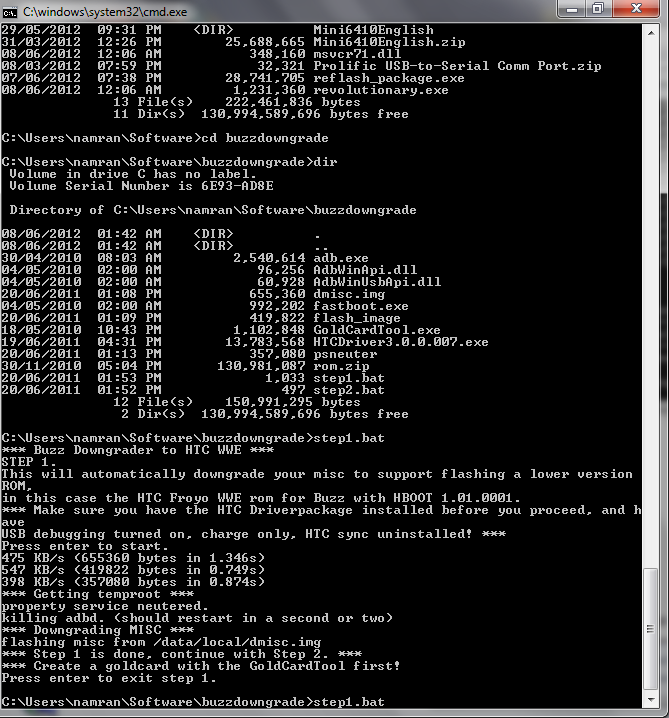
extract to somewhere short .. i.e (C:/buzzdowngrade/)
On Windows 7.. try “cmd” with the Administrator privilege.
cd C:/buzzdowngrade/ step1.bat |
Complete the “step 1” by following step by step..
ensure the phone is in “Charge Only” and “USB debugging enabled.
then.. make the GoldCard using the other application.. also as “run as Administrator”
1. Make sure USB Debugging is enabled on your phone in Menu > Settings > Applications > Development.
5. Connect the phone to your computer via USB and set the mode to charge only.
6. Launch Gold-Card Tool on your computer and click ‘GetCID’.
7. Copy the CID code from the text box and click the link shown below that text box to open it in your browser window.
8. In the browser window, enter all the details required and submit that form.
9. You should now get an email from PSAS. Open it and download the ‘GoldCard.img’ attachment.
10. Now set your phone’s USB mode to Mass Storage.
11. In Gold-Card Tool, click ‘Refresh’.
12. Select your mounted SD card from the drop-down menu saying “HTC MMC:”
13. Click ‘Load Goldcard.img’ and select the file downloaded in Step 11.
14. Click ‘Patch MMC’ and your Gold Card will be created. You may exit Gold Card Tool once done.
** I did successfully it without reformatting the SDCard. It is recommended to format it to FAT32 first if you have problem to read.**
Now proceed to Step 2.. just follow the instruction.. then It would replace the HBOOT accordingly..
It would downgrade the ROM to “Android 2.1 Éclair”
Turning off protection – S-OFF
Once , the HBOOT is downgraded.. You can now use the tools to remove the protection and install custom recovery image.
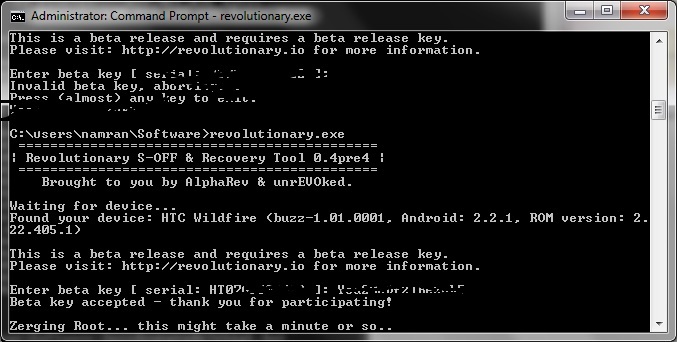
Revolutionary
* Steps:
1st You need to get to: http://revolutionary.io/ to download the tool,
and to get your “beta key” which you’ll get in a pop-up window in the same download page after you click the download link for (windows version).
The “beta key” is a must; the tool won’t work without it!
You’ll be asked to provide your phone “serial no.”, typically it should be something like HTXXETDXXXXX, and you can get it from:
Settings –> about phone –> phone identity.
or use the following command if you have the Android platform SDK installed.
adb devices |
then again.. use “Command Prompt” with “Adminstrator” access..
run the revolutionary.exe

wait for a while..
then.. if successful.. it would asked if want to flash the recovery images..
provided you have a decent internet connection.. I would just press “Y”.

Once the custom recovery installed.
.. yeah !
the rest is pretty much easy..
Download CM7 into SDcard
Download the CM7 from http://www.cyanogenmod.com/devices/htc-wildfire.
and also .. Google Apps from.
http://wiki.cyanogenmod.com/index.php?title=Latest_Version/Google_Apps
Put into your SD Card by mounting it as “USB Drive” and copy into its “/” folder.
Install CM7
Just reboot the Phone into HBOOT..
using the VOLUME DOWN.. choose to Recovery mode.(by press POWER Button).
then the “REVOLUTIONARY CM Recovery” will appear..
Once the device boots into the ClockworkMod Recovery, use the side VOLUME buttons to move around, and either the POWER button or the TRACKBALL to select.
• Select the option to “Wipe data/factory reset”. (then press the TRACKBALL)
• Then select the option to “Wipe cache partition”.(then press the TRACKBALL)
• Select Install zip from SDcard.(then press the TRACKBALL)
• Select Choose zip from SDcard.
• Choose update-cm-7.0.3-buzz-signed.zip & Let it install.
• Once done, Select Install zip from SDcard.(then press the TRACKBALL)
• Select Choose zip from SDcard, choose gapps-gb-20110307-signed.zip
• Once the installation has finished, get back to the main menu by clicking the POWER button and select the “Reboot system now” option.
it make take longer to boot up for the first time.. Just be patience.
It shall now boot into CyanogenMod.
Goodluck..
Disclamer : this might void all or part of your warranty on phone.. :)


